


Mac Studio: A Review
If you were able to time travel back to 2007 and give someone the list of Mac desktops from March 17th, 2022, they would not see any differences. Not a single one. Back in 2007 there were three desktop models, the Mac mini, the iMac, and the Mac Pro. Yes, the form factor, designs, and internals have all changed, but someone the actual devices and their place in the lineup would be instantly understood and comprehended.
It is not often that Apple introduces a new Mac model to the lineup. But, that is exactly what Apple has done. That device, is the Mac Studio. Before we dive into the Mac Studio, let us briefly look at recent Apple desktops.
Brief History of recent Apple Desktops
Apple has always had desktop computers. Their first computer, the Apple I, was a desktop. Apple has continually improved their desktops through the mid 1990s. The problem with the approach that Apple was taking in the mid-90s was that they were really no different than PCs. In fact, they were allowing companies to clone the Mac and as many who used the clones during the time would say, they are not very good. That changed when Apple cofounder Steve Jobs returned to the company. Shortly after his return to Apple, he introduced a new product, the iMac.
The iMac was an all-in-one device that was self-contained, no separate monitor and computer. Apple continued to update and refine the iMac to include a flat-panel display. The iMac was the first device that Steve Jobs re-introduced after he returned to Apple and became interim CEO in 1997, after Apple purchased NeXT. The iMac has continued to be updated and changed since its introduction in 1998.
In 2012 Apple introduced a new iMac size, to go with the 27-inch model. That size was the 21.5-inch model. In 2014 Apple introduced a revision that was the first retina version. The 27-inch iMac was updated in mid-2015, late 2015, mid-2017, early-2019, and mid-2020.
High-end Mac Languishing
Throughout the mid-2010s many Mac users were questioning what Apple was doing with the Mac. The reason that this was being questioned is because it seemed as though the Mac had stagnated and was not getting the attention that many thought it deserved. This was particularly true in 2015 and 2016 where the high-end of Mac line had not seen any meaningful changes in the Mac Pro. At the time, the model was last updated in 2013, but that model was a revolutionary design, a cylinder.
In April 2017 Apple convened a roundtable for journalists that re-iterated the fact that the Mac was not dead and that they were still committed to the Mac. At the roundtable Apple indicated that "we’ll see improved iMacs that Apple feels will appeal to a segment of Pro users".
Specifically at the Mac roundtable in 2017, Apple's Phil Schiller stated:
"As part of doing a new Mac Pro — it is, by definition, a modular system — we will be doing a Pro display as well. Now you won’t see any of those products this year; we’re in the process of that. We think it’s really important to create something great for our pro customers who want a Mac Pro modular system, and that’ll take longer than this year to do."
While it would take a bit for the new Mac Pro, more on that in a bit, it was not long after that meeting where Apple would introduce a new product, the iMac Pro.
iMac Pro

Introduced at their World Wide Developer Conference in June of 2017, the iMac Pro was a more professional iMac. The iMac Pro had the same physical dimensions of the regular 27-inch iMac, but it had entirely redesigned internals. The iMac Pro was aimed at more professional users. The iMac Pro included workstation-level processors, the Intel Xeon line, as well as error-correcting code, or ECC, memory.
Beyond the workstation graphics and ECC memory, the iMac Pro also included a 1TB solid state drive, which was possible with the standard 27-inch iMac, but this was still during the spinning hard drive era of the iMac. There was 32GB of memory as a base, but could be upgraded to 256GB of memory, if desired.
The iMac Pro also included a dedicated AMD Radeon Pro Vega video card, with up to 16 Gigabytes of dedicated graphics memory. The iMac Pro was not an inexpensive machine. Not by any means at all. The iMac Pro had a starting price of $4,999, so nobody would buy this on a whim. The iMac Pro was a one-off product that continued to be sold until March of 2021, when Apple announced that they would stop producing the iMac Pro and would continue to sell the iMac Pro until supplies ran out.
Even though Apple stopped selling the iMac Pro, there was still the other professional Mac, the Mac Pro.
Mac Pro

When the iMac Pro was introduced, some had speculated that the iMac Pro was intended to be the top of the line Mac and that the Mac Pro was no longer going to be updated. But, that was not the case, because Apple explicitly stated that they were working on a new Mac Pro, but it would not be coming in 2017. In fact, it would not be introduced until two years after the introduction of the iMac.
There is the 2019 Mac Pro, which was unveiled at WWDC in June of 2019 and went on sale in December of 2019. Introducing the Mac Pro at WWDC was the right decision because one large segment of power users are developers.
At the same event as the introduction of the Mac Pro Apple also released their first all-new standalone display in nearly 9 years, and three years after selling standalone displays. That product is the Pro Display XDR.
I could dive deep into the Mac Pro and the Pro Display XDR, but that is not the primary focus of this review. Even though it's not the focus, it is important that we keep in mind both the iMac and iMac Pro, because they come into play with a new Mac desktop, the Mac Studio. We will look at the Mac Studio in a bit, but before we do, let us look at a bit more history. Let us turn to my personal history with Mac Desktops.
Personal History with Mac Desktops
March 28th, 2022 marked the 15th anniversary of me using a Mac. As I posted in my retrospective, my first Mac was the Late 2006 20-inch iMac that I purchased in March of 2007. According to some, including @TweetDowns, I am merely a "rookie", when it comes to using Macs. I take no offense to being called a "rookie" even though I have been using a Mac for 15 years, because there are those who have been using them for far longer than I have.
If you have been reading the site for a while you likely notice that I end up getting a new iPhone and a new Apple Watch every year. One thing that you may also notice is that while I end up buying a new iPhone and Apple Watch every year, I tend to use my Macs for quite a bit longer. In fact, in my time using Macs, I have owned four Mac desktops, all three have been iMacs. These models have been Late 2006 20-inch iMac (purchased in March of 2007), a Mid-2011 21.5-inch iMac (purchased in July of 2011), and a Mid-2017 27-inch iMac (purchased in July of 2017). On average I end up replacing my Mac desktop every five years. And it has been just about five years time to replace it. I do not exclusively use Mac desktops though, I also have owned some Mac Laptops. Unlike desktops I have only owned two laptops. These are the Mid-2007 13-inch Black MacBook and the early-2015 13-inch MacBook Pro.
On a side note, astute and diligent readers may remember that I also have a base-model Mac mini (M1, 2020), and they may be wondering why I did not include that one in my list. Well dear reader, that is a good observation. The reason I did not include it is that the Mac mini has not been my "daily" computer. It use it exclusively for testing app builds and running beta versions of macOS. It uses an entirely different account and has none of my personal data. With that, I decided to not include it in my list of desktop Macs.
When I started thinking about which device to replace, my mid-2017 iMac or my early-2015 MacBook Pro, I was initially leaning towards replacing my MacBook Pro, since it is now seven years old. While making these decisions I could not decide whether or not to just get one replacement machine, a MacBook Pro with higher specifications, or continue with my two-computer setup.
It turned there was something that caused me to end up replacing my iMac. The thing that prompted the replacement was that the iMac screen began to crack. I noticed the initial crack in March of 2021 and at the time it was small crack and it was stable for almost a year. But, over the course of about month it started to expand from that one inch (2.54cm) crack to be 18 inches (45.72cm) overall.
Once the crack started expanding, that is when I decided to replace the iMac. I ended up buying a Mac Studio with a Studio Display. I will not cover the Studio Display, at least not in-depth, because I did an entire review of the Studio Display. The Studio Display will absolutely come up in the review, but it will be in context of the Mac Studio, and now onto my review of the Mac Studio.
Mac Studio
Apple introduced the Mac Studio last month, in March of 2022 at their "Peek Performance" event. This is the first new all new Macintosh design since 2006 with the Mac Pro. After the event Apple also did something else, they quietly removed the 27-inch iMac from sale. This makes sense, given that they introduced a standalone display, the Apple Studio Display, at the same event.
Design
When Apple introduced Apple Silicon at their World Wide Developer Conference in 2020, many thought it would be an opportunity for Apple to redesign all of the Mac models. However, the first models with Apple Silicon did not have any redesign, not even some internals were changed. This makes complete sense to use this approach. The reason that this makes sense is that if you do not change anything then you can do all of your development in secret without anybody knowing that something new is coming. This is exactly what Apple did for their first round of Apple Silicon devices, the MacBook Air, 13-inch MacBook Pro and the Mac mini.
Even though Apple used the exact same enclosures and ports for their first round of machines, they did not continue to do that for newer models. While the MacBook Pros were not the first ones to get a redesign, they were the most anticipated The most anticipated updates were the higher-end MacBook Pros. In particular, Apple redesigned the 16-inch MacBook Pro. Along with the 16-inch MacBook Pro came a smaller model, the 14-inch MacBook Pro alongside it. The exterior of these laptops were redesigned including ports that users had been asking for, including MagSafe charging, HDMI, and an SD Card slot.
The first device to see a significant change was actually the 21,5-inch iMac. The 21.5-inch iMac got such a redesign that it was actually replaced with the 24-inch iMac. The 24-inch iMac was a radical change that included a set of new colors, an external power brick with a built-in ethernet cable, and a thin screen. While the 24-inch iMac was a great design, many were waiting for the replacement for the 27-inch iMac. That replacement is the Mac Studio.
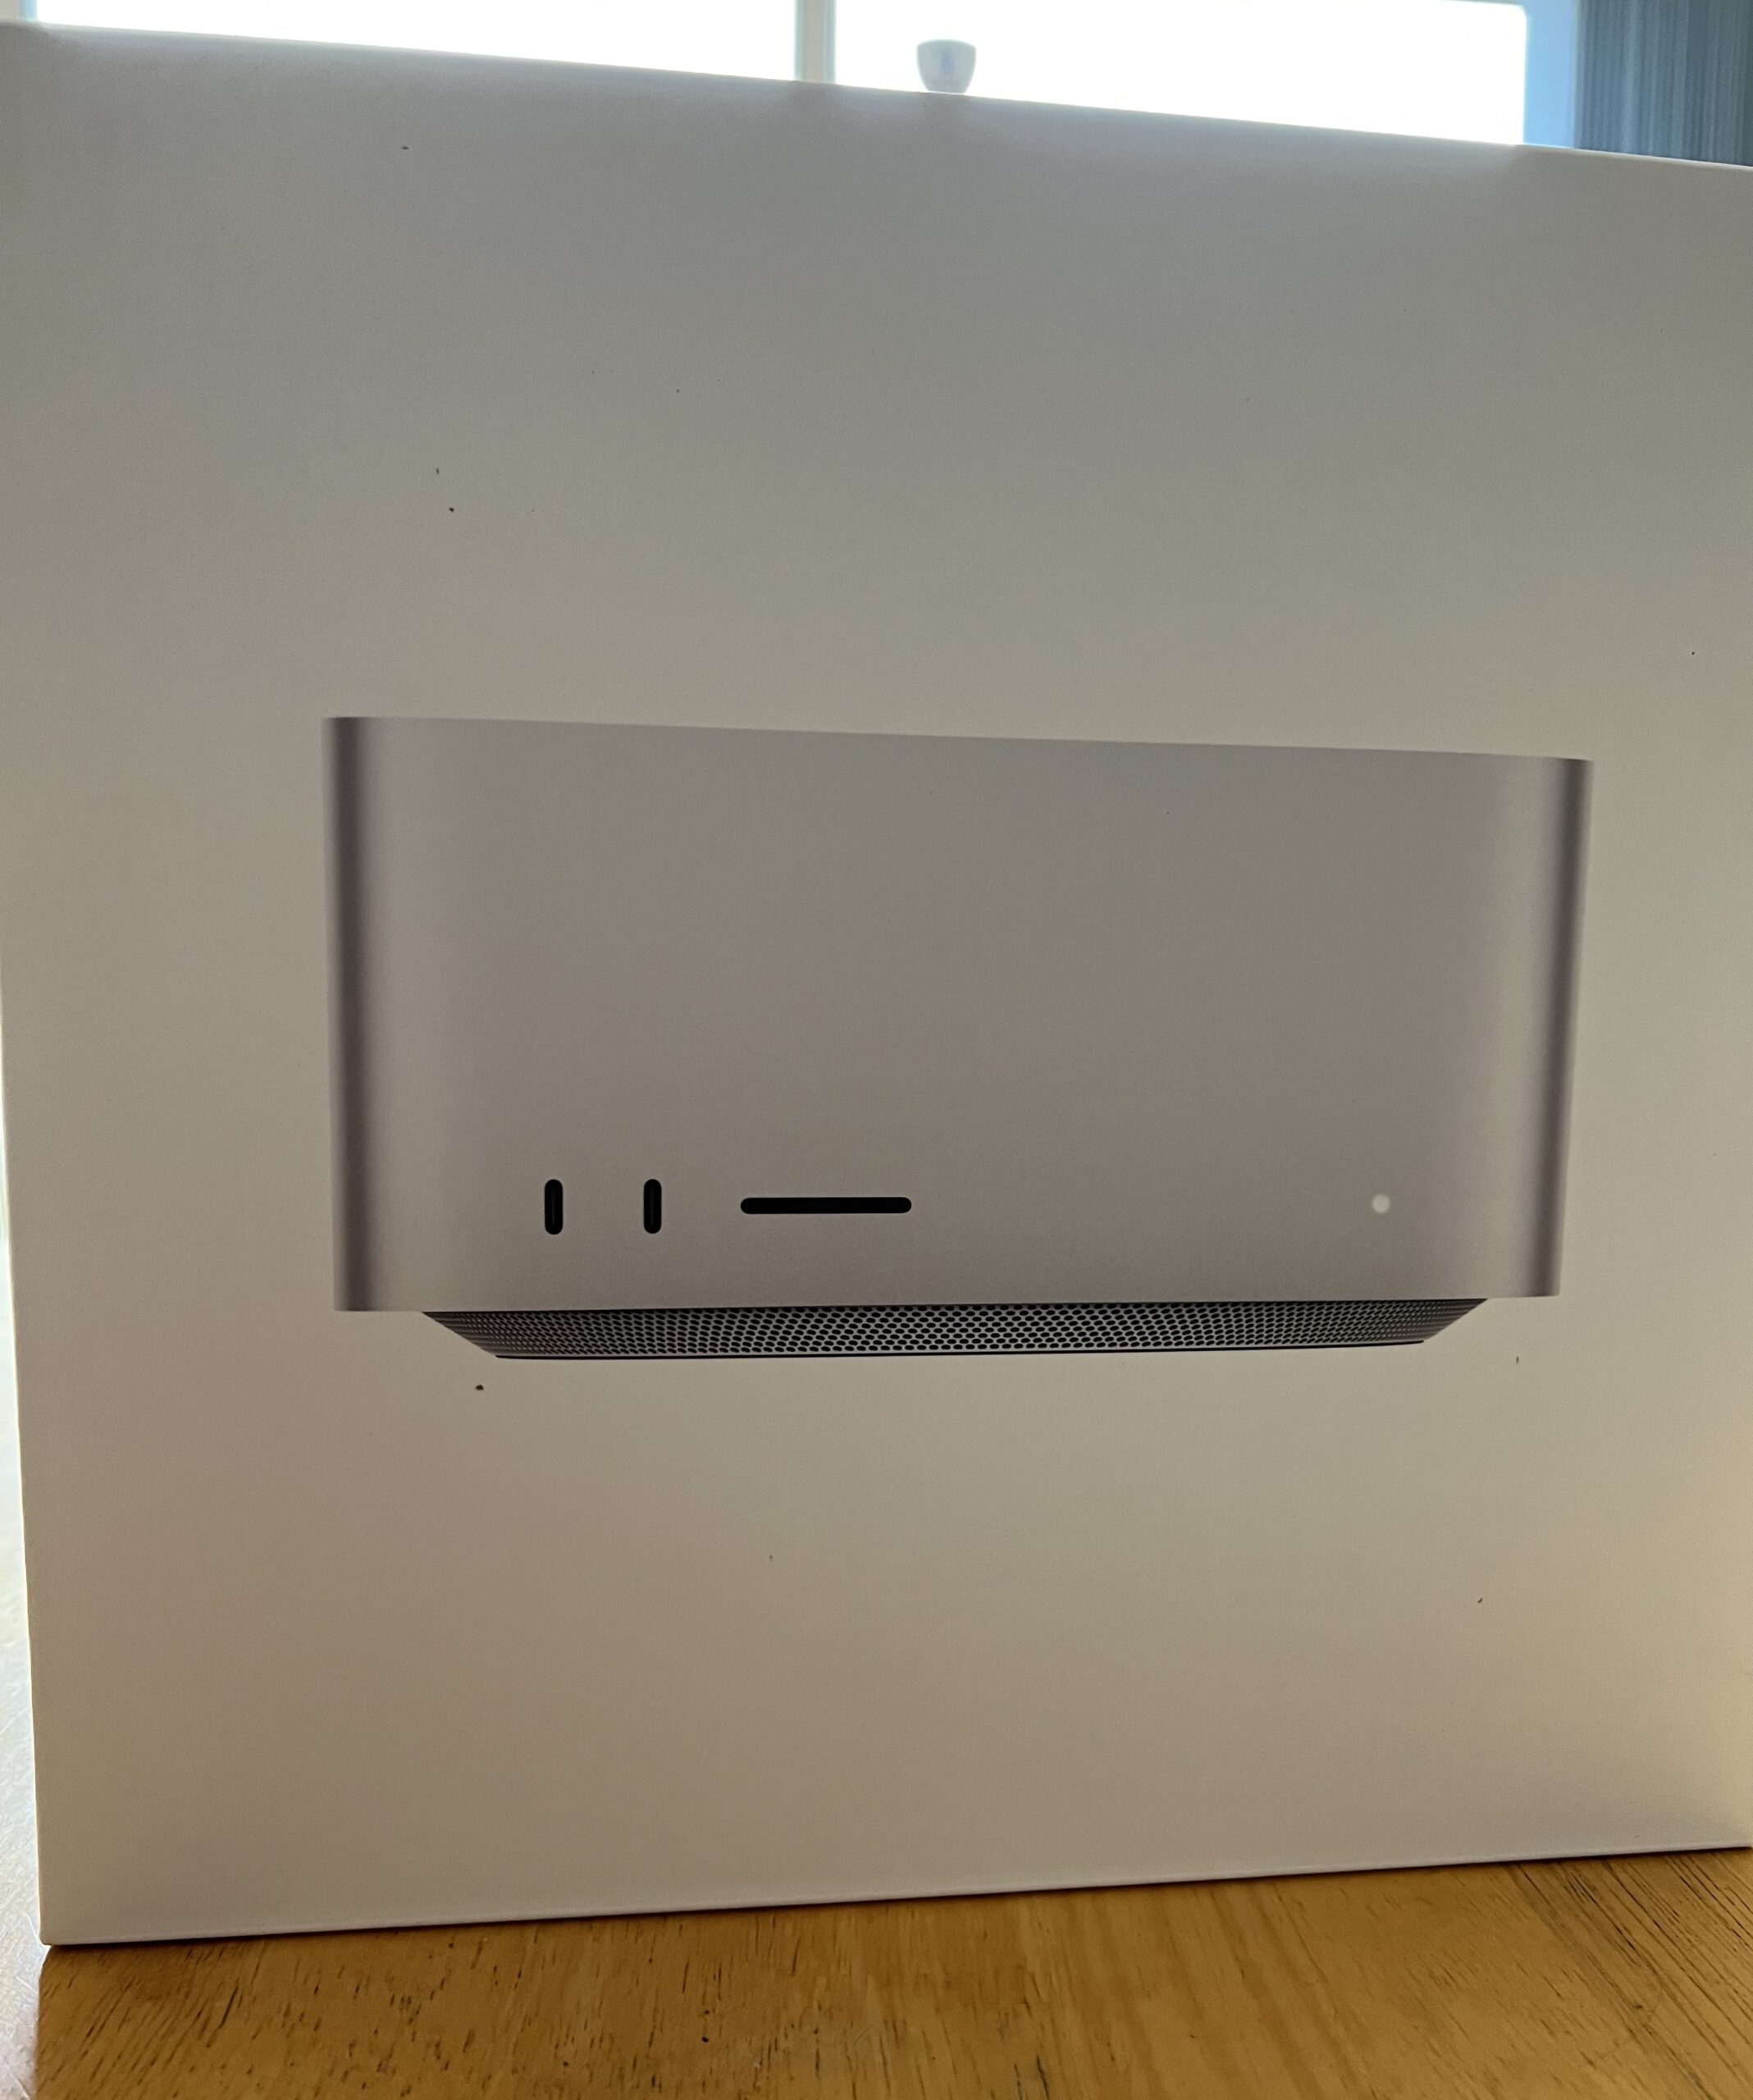
The bottom of the Mac Studio is very reminiscent of a device that was unveiled in September of 2006 and released in March of 2007, the original Apple TV. The similarities are that they have approximately the same physical size, but the item that is most similar is that both of the devices have rubber element that is covering the entry point to the device. It is a full rubber pad for the original Apple TV and a rubber ring for the Mac Studio. Another similarity, the rubber ring, or pad, will be completely destroyed if you try to remove it. It was possible to remove the Apple TV rubber pad, but more often than not you would ruin it.
The physical dimensions of the Mac Studio are 7.7 inches (19.7cm) by 7.7 inches (19.7cm) by 3.7 inches (9.5cm). The is the same physical footprint as Mac mini and the original Apple TV. The Mac Studio is significantly taller than the Mac mini, which stands at 1.4 inches (3.6cm). This is just a bit over two Mac minis tall.
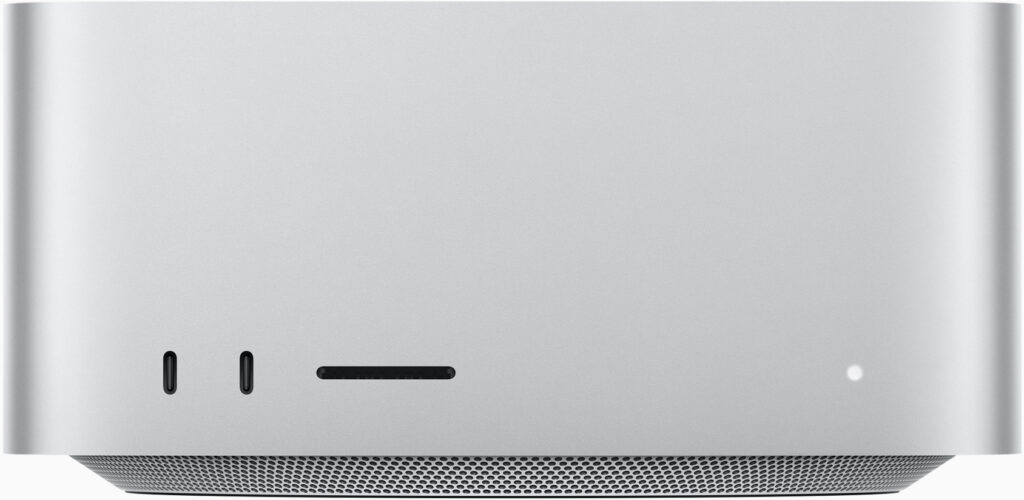
On the front of the Mac Studio is a power light indicator. This light is not super bright, which is good, but it is bright enough to be able to easily see no matter how much ambient light is available. I do not know if the light's intensity is because it is how the type of light that Apple sourced is designed, or if Apple added a bit of diffusion within the case of the Mac Studio.

Weight
The Mac Studio is a somewhat heavy device, at least compared to the Mac mini. In fact, the Mac Studio is 5.9 pounds, or 2.7 kilograms. The Mac mini is 2.6 pounds, or 1.2 kilograms. The Mac Studio is 2.25x heavier. This somewhat makes sense because the Mac Studio is more than two Mac minis on top of each other. The difference in weight is partially the case for the Mac Studio but a majority of it is due to the fan assembly and heatsink. The M1 Ultra is slightly heavier at 7.9 pounds, or 3.6 kilograms. The reason for the M1 Ultra being even heavier is due to the copper heatsink that provides even better heat dissipation.
It is not often that you will move the Mac Studio, but it is something to be aware of should you need to move it on a regular basis. Next, let us look at the modularity of the Mac Studio.
Modularity
When Apple introduced the Mac Studio they discussed that the Mac Studio is modular. When Apple mentioned this many likely thought "wait, this is the Mac Pro mini that was rumored". Unfortunately for them, that is not the modularity that Apple was talking about. When Apple mentioned modularity they meant that the screen and computer are both modular. Meaning, that you could replace either of the items instead of needing to replace both at once.
This approach does have its merits, in particular the fact that you are more likely to upgrade the Mac instead of the display. I know that is my intention for the Mac Studio and Studio Display. I intend to use the Studio Display for a long while and I am more likely to replace the Mac Studio before the Studio Display.
There is another aspect to "modularity" when it comes to the Mac Studio. Unlike many of Apple's other Macs, the storage is not soldered onto the logic board for the Mac Studio. This means that Apple can easily provide additional storage options, but more on that later.
I think this was deliberately done. As my friend, and editor of my books, Barry Sullivan astutely pointed out, the Mac Studio is designed to be the replacement for both the 27-inch iMac as well as the iMac Pro. When he mentioned this, it instantly made sense that it was exactly what Apple had intended to do, and just reinforced Apple's decision to remove the 27-inch iMac from sale. The best way to illustrate this is by explaining the two System-on-a-Chip, or SoC, options available for the Mac Studio.
Apple Silicon on Mac Studio
Apple Silicon is Apple's replacement for using Intel processors in the Mac. The plan to transition away from Intel was unveiled at Apple's WWDC 2020. The first Apple Silicon machines, with the designation of M1, went on sale in November of 2020 with the introduction of three machines, the M1 MacBook Air, the M1 13-inch MacBook Pro, and the M1 Mac mini.
Any Apple Silicon chip is significantly different than a traditional computer setup because it is a System on a Chip, or SoC. With Apple Silicon there is no difference between the system memory and the graphical memory. This means that there are significant improvements in speed due to both the main system memory and graphics memory being a single pool and there is no penalty for moving memory between the CPU and GPU, which requires time. With Apple Silicon there is no delay.
One of the things that Apple has been able to do with the transition to Apple Silicon is to make the processor line up a bit easier to understand. The line up of chips is quite straightforward. There are four chips in the M1 line. These chips are:
- M1 (no moniker)
- M1 Pro
- M1 Max
- M1 Ultra
As you progress the capabilities of each system on a chip changes and improves.
| M1 | M1 Pro | M1 Max | M1 Ultra | |
|---|---|---|---|---|
| Total Cores | 8 | 8/10 | 10 | 20 |
| Efficiency Cores | 4 | 2 | 2 | 4 |
| Proficiency Cores | 4 | 8 | 8 | 16 |
| GPU Cores | 8 | 14/16 | 24/32 | 48/64 |
| Memory | 8GB/16GB | 16GB/32GB | 32GB/64GB | 64GB/128GB |
| Neural Engine Cores | 16 | 16 | 16 | 32 |
| Thunderbolt Ports | 2 | 3 | 4 | 6 |
If you look at the progression of the SoCs you will see that as the chips progress, the maximum amount of memory doubles. This is absolutely the case between M1 Max and the M1 Ultra.

System-on-a-Chip Options
The Mac Studio has two different processor options; the M1 Max and the M1 Ultra. The M1 Max has two variants, one with 24 GPU cores and another with 32 GPU cores. The M1 Ultra variants are exactly double that of the M1 Max, therefore the M1 Ultra has 20 CPU cores, with 16 performance cores, and 4 efficiency cores, and 32 Neural engine cores. There are also two variants, one with 48 GPU cores or the second with 64 GPU cores.
The M1 Ultra is actually two M1 Max chips paired together with a connector, called "UltraFusion". When a developer hears or reads "two M1 Max chips together", they are likely to instantly be put on guard. The reason for this is that when there you have two processors that typically means that you, as the developer, needs to handle addressing the various processors and memory on their own.
However, that is not the case. From the perspective of macOS, the M1 Ultra is still seen as single processor, which means that developers do not need to perform any special programming to be able to take advantage of the additional bandwidth, cores, and memory. Instead, macOS can handle all of it for you.
I think that Apple intentionally chose the M1 Max and M1 Ultra as the options for the Mac Studio, to directly replace the 27-inch iMac and the iMac Pro; with the M1 Max being the equivalent of the 27-inch iMac and the M1 Ultra being the equivalent of iMac Pro.
The M1 Max and M1 Ultra both run at 3.2GHz, just as is the case with all of the M1 processors, including the M1 and M1 Pro. Next, let us look at what ports are available on the Mac Studio.
Ports
One thing that people often need to do with their device is attach devices. What is attached could be a variety of items, like external hard drives, thumb drives or any other external device. While some MacBooks and MacBook Pros have had a limited number of ports, including the single USB-C port on the 12-inch MacBook, Apple's desktops have always had many ports. The Mac Studio is no exception to this.

The Mac Studio has a number of ports. Unlike all other desktop Macs, and even the aforementioned 27-inch iMac and iMac Pro, there are ports on the front of the Mac Studio. There are actually a dozen ports for the Mac Studio. The entire list includes:
Rear Ports
- Four Thunderbolt 4/USB-C ports
- Two USB-A ports
- One HDMI port
- One 10Gbps ethernet port
- One 3.5mm Headphone port
Front Ports
- Two USB-C (Two Thunderbolt 4 with the M1 Ultra)
- One SDXC slot
This is a large number of ports. In fact, this is the largest number of ports that are built-in on any Mac sold today. You can easily add more ports on the Mac Pro with add-in cards, but the Mac Studio has more built-in ports than even the Mac Pro. The Mac Pro has eight included ports, as compared to the Mac Studio's 12 included ports. <b>Note</b>, the Mac Pro does have two ports on the top of the machine, so one might argue that these are the equivalent of "front" ports, because they are very convenient for users to plugin transient items.
The front ports on the Mac Studio can vary depending on which SoC is in the machine. For the M1 Max you will get two USB-C ports, while the M1 Max will have two Thunderbolt 4/USB-C ports. The reason for this is that there is more bandwidth available to support Thunderbolt on those two ports.
The nature of technology is generally a forward march of progress. However, sometimes that forward momentum requires some legacy ports to be brought along. In 1998 when the original iMac was released there were no "legacy" ports. At the time this would have included SCSI, parallel, 3.5-inch floppy, VGA, or even standard keyboard and mouse connectors. Instead, Apple went all in on USB because it was the future of technology. In hindsight, that was the right call. PCs had included USB for a while, but they still had legacy ports as well as USB ports.
As much as we would like to get rid of old technology it is not easy to do. Even 26 years after its initial introduction, the original USB plug, called "Type A", is still on the Mac Studio. There are only two USB-A ports and 6 USB-C ports. If you need more than two USB-A ports, you have a couple of options, you can either get an adapter or you can get a USB-A hub to add even more ports.
The SDXC card slot is a port that not everybody will end up using. I know I am not likely to use it, not that I will never use it, but it is not a port that I need to use on a regular basis. Both my mid-2017 iMac and early-2015 MacBook Pro both have an SDXC slot on them, and I have used them on occasion, but the times when I do use it are few and far between.
For those who do use it regularly though, it will be much more convenient to have the SDXC card slot on the front of the Mac Studio will make it remarkably more convenient. Most particularly if you need to import or expo video files to an SD Card slot on a regular basis.
Now, let us see how much the Mac Studio costs, if you want to contemplate purchasing one.
Pricing
Normally, I would look at a price comparison between the 27-inch iMac and the Mac Studio with Studio Display, but I do not think that is necessarily an appropriate comparison. The reason for this is because the Mac Studio is not only an entirely different machine, you cannot directly compare them. Sure, you could try to make an approximation, but the devices are so fundamentally different products.
The iMac is an all-in-one device meanwhile the Mac Studio is designed to be modular, where you can use any monitor with the Mac Studio, and as mentioned earlier, you can upgrade the display and computer separately as needed.
The Mac Studio starts at $1999 for the 10-core CPU and 24-Core GPU model, with 32GB of unified RAM and 512GB of storage.. In 2022, a computer that starts at $1999 should have at least 1TB of storage. To me, 512GB does not seem like enough storage space for the price. Unfortunately, this is typical of how Apple prices their devices.
If you want an M1 Ultra, you can get one, but be prepared to pay quite a bit. The Mac Studio with the M1 Ultra will get you 20-core CPU, 48-Core GPU, 64GB of unified memory, and 1TB of storage. Just as many other aspects of the M1 Ultra being double the M1 Max, the price is also double. The M1 Ultra starts at $3999.
The Mac Studio with M1 Ultra, 40CPU Cores, 64 GPU Cores, 128GB of RAM, and 8TB SSD would come to a total of $7999. You can configure just about any price between $1999 and $7999. Now, let us look at what I actually ordered.
My Configuration
The configuration I opted for is the 10-core CPU, 24-Core GPU model and 32GB of unified memory, which is the base configuration. I did decide to make one upgrade. I upgraded the unified storage, and I went with 2TB of storage. The 2TB of storage is less than I have in my 2017 iMac, which was a 3TB Fusion Drive. The 32GB of unified memory is more than the 24GB of total memory I have in my iMac.

I did think about going up to 4TB, but that would have added another $600 on top of the $600 for the 2TB. Instead, I decided to stick with 2TB and if I need more storage I can use an external drive, there are plenty of drives for that.
Another reason I went with 2TB is that I store most of my documents using iCloud, so if it really comes down to it, I can just remove the items from my Mac and keep them in iCloud. Should I need them again I can download them again. I can also keep things on an external drives if needed, and this is in addition to my other cloud backups as well.
The reason I went with the base processor is that it is way more than I think I will need for the next five years. 32 CPU Cores and 24 GPU Cores are way more than I have had in any Mac, let alone any computer, that I have used on a regular basis. Now, let us look at Apple Silicon as a daily machine.
Apple Silicon as a Daily Machine
Technically, the Mac Studio is not my first Apple Silicon machine. This is because I did purchase an M1 Mac mini back in November of 2020 when they were announced. I got the base model M1 Mac mini, no upgrades. I ordered this after a friend of mine tested my app, wwriteLite, on their M1 MacBook Pro and the app was crashing.
The M1 Mac mini has been a test and development machine. The M1 Mac mini came in handy for my book, "iOS 15, iPadOS 15, macOS Monterey, tvOS 15, and watchOS 8 for Users, Administrators, and Developers", last year. The way that the M1 Mac mini was very helpful was because there were a couple of features that were only available on Apple Silicon Macs, and it was my only M1 Mac. Along with this, my 2017 iMac and 2015 MacBook Pro did not get some of the features that were introduced with macOS Monterey, so it was handy being able to use those new features when writing my book.
Even though I have owned an M1 Mac mini, I did not use, and have not used, it on a daily basis as my primary computer. The Mac Studio is my daily machine and this is the first time I have used an Apple Silicon machine regularly. So, I thought I would share my thoughts on a few things that I have noticed while using an M1 machine every day, starting with Xcode.
Xcode
My day job is to work on both web apps and develop and iPadOS app that is used at work. In order to build and iPadOS app you need to use Xcode. My 2017 iMac has been what I have primarily used to develop the app we use at work. Beyond this, my 2017 iMac has been the machine that I have done all of the work on my own app, wwriteLite, since I got the iMac in July of 2017.
I did some benchmarks for how long it took to build my app. I ran three different trials to get an average amount of time to compile. These builds were full clean builds, not incremental ones. Here are the results of those trials:
| Device | Trial #1 | Trial #2 | Trial #3 | Average |
|---|---|---|---|---|
| Early-2015 MacBook Pro | 141.26 | 115.84 | 121.44 | 126.18 |
| Mid-2017 iMac | 61.00 | 49.25 | 46.15 | 52.13 |
| Late 2020 M1 Mac mini | 32.90 | 28.60 | 30.30 | 30.60 |
| Early 2022 Mac Studio | 26.30 | 24.92 | 23.18 | 24.80 |
You can clearly see the difference between the iMac and the Mac Studio. The Mac Studio takes half as much time compile my app, and this was just for full builds. Incremental builds did not always take that long to build, but they could still take some time. While I have not done any extensive testing, I suspect that incremental builds will also be a bit faster, but I do not expect the to be twice as fast.
Xcode contains a huge number of features. One of the most power hungry, and most problematic ones, that I encountered when doing development has been SwiftUI Previews. In case you are not aware, SwiftUI is Apple's Swift-only framework that uses a whole different approach than traditional programming. SwiftUI uses a declarative syntax. The declarative syntax can allow you to quickly iterate by allowing you to make changes and view them instantly. When doing development on my iMac whether SwiftUI Previews would work was severely hit or miss.
Having used the Mac Studio for a little bit and using Xcode I can say for certain that the Mac Studio is a much better platform for using SwiftUI Previews. The Mac Studio was not only able to render my SwiftUI Previews, but it was able to do so without making the fans spin up.
When I did an actual build of my app to run in a simulator the power usage did spike to around 50 watts, but this was brief and intermediate and when the app was actually running in the simulator the temperature of the Mac Studio was hovering around 100 degrees celsius, and the power quickly ramped back down.
As mentioned, SwiftUI Previews can be very power hungry. If I was able to use SwiftUI Previews on my iMac, the fans would almost invariably spin up to 100%. When the fans spin up, they can generate a lot of noise, and on the topic of noise, let us discuss noise with the Mac Studio.
Noise
When the Mac Studio was first in the hands of individuals there were some that indicated that they could hear the fans in the Mac Studio. The fan noise did not bother some, but the Mac Studio was loud enough that it caused some people to return their Mac Studio machines. I have not been able to hear the fans, no matter what I am doing. I have not been able to make the fans spin up in day to day usage. As I stated earlier I do have iStat Menus installed and I can manually make the fans spin up, and I did just to make sure that they were functioning. But in my day to day usage I have not been able to make them spin up. Not even when I was doing my encoding tests.
Most of the time I have not heard much noise coming out of my other Macs either. I tend to have pretty good hearing and if there is even a slight change in the fans, I typically hear it. There is a caveat to this, in order for me to hear most changes I need to not be wearing my headphones.
When I am wearing my headphones I am not prone to hear slight changes in fan noise. However, if the fans really spin up, I will absolutely hear them, even over my music, which is not that loud. When this happens, I know something has gone awry and I need to look at it. Typically the fix is to kill whatever process is causing the excessive fan noise. The major reason that the fans turn on is to remove any excess heat from the system. Let us now look at the temperature of the Mac Studio.
Temperature

One of the things that might make fans spin up on any device is the internal temperature of the device. The reason for this is that devices need to stay cool so they do not overheat. Overheating in the computer world can lead to rather disastrous results. While it is not likely to happen these days, too much heat can cause components to get damaged and can cause systems to fail. macOS is designed to automatically adjust the fan speed as needed.
I have iStat Menus installed to be able to keep tabs on how warm my systems get. I do not normally need to worry about desktop Macs, and I am not at all concerned about the Mac Studio. I primarily use iStat Menus on my 2015 MacBook Pro, which can get a bit warm at times, particularly if I have any JavaScript heavy webpages loaded.
Even though I am not worried about it on the Mac Studio, I did install iStat Menus to see what temperature ranges would be shown during normal usage of the Mac Studio. Most of the time the Mac Studio is between 92 and 96 degrees celsius. This is about the same range as my 2017 iMac, but 15 degrees cooler than my 2015 MacBook Pro. If I manage to stress the CPU cores, or the GPU cores, the temperature might reach around 140 degrees celsius. I saw the Mac Studio reach this temperature when I was doing my encoding tests. Even when the temperature was that high, the fans never spun up beyond their standard idling speed of approximately 1325 rotations per minute.
The Mac Studio is designed to stay as cool as possible. The top half of the Mac Studio is a fan assembly that will pull air from the bottom of the Mac Studio over the components, forcing the hot air to rise and be pushed out of the back of the Mac Studio. Now that we have covered the fans, let us look at another item that might make some noise, but this one is likely to be more deliberately done. That feature is the speakers.
Speakers
Almost every computing device sold these days has some way of providing feedback. On an iPhone and Apple Watch this can be through haptics, or the speaker. On the iPad it has to be through the speaker since there are no haptics. The same applies to the Mac Studio which only has speakers for feedback.
The speaker on the Mac Studio is, as you might expect, functional, but far from the highest quality, but this is expected. The Mac mini and Mac Studio are not devices that people typically buy for their speaker quality. The Mac Studio speakers are decent and do have more bass than the Mac mini, but cannot compare even to my 2017 iMac speakers. Even though they are not as good as my iMac, they are are a bit better than my early-2015 MacBook Pro speakers, in that they have more bass. This is not surprising given how much more room there is for the speakers in the Mac Studio.
The Mac Studio speakers are very functional and serviceable, particularly if you only want to listen to stuff like podcasts, but you may want something else, like a HomePod or a pair of wireless headphones, if you plan on using the Mac Studio for listening to audio. The decision to not make the Mac Studio speakers the best out there makes sense, particularly since the Mac Studio is designed to be paired with the Studio Display. If you have a Studio Display connected to the Mac Studio, those speakers are absolutely a better choice, and the way to go. On the topic of the Studio Display, let us briefly turn to using dual Studio Displays.
Dual Studio Displays
When Apple announced the Studio Display, it is a product that many were waiting to be released. I was amongst those who were waiting. Since I had been waiting, I ordered a Studio Display as soon as the event was over. When I ordered the Studio Display I anticipated using the Studio Display as a second monitor for my iMac.
Prior to receiving the Studio Display, I had been using my iMac with a 27-inch Dell monitor, so I was accustomed to having a dual-monitor setup. The 27-inch Dell is model SE2719H. This model is not a 4K monitor and it can support a maximum resolution of 1920 pixels wide by 1080 pixels tall. I bought this monitor in June of 2020 as a second monitor for my iMac. As mentioned in my review of the Studio Display, I completely enjoyed having a two full 5K screens on my desk.
Having two displays with the same resolution and overall features make things easier to handle and less jarring when moving between the windows and items on the two displays.
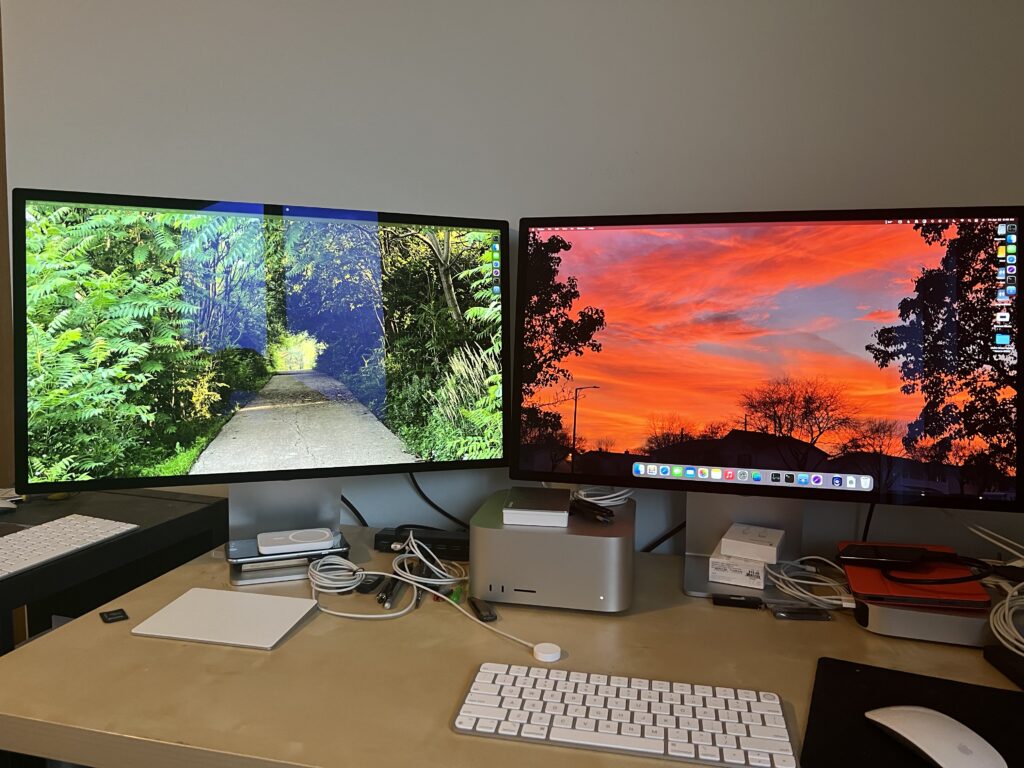
When I ordered my Mac Studio I also ordered another Studio Display. I ordered the exact same configuration for the screen, which is the Studio Display with the Tilt-Adjust stand. I will not lie, I went back and forth about whether to get the second Studio Display, because I thought it might be a bit too excessive, but I ordered it none-the-less. I also debated on ordering a Studio Display with Tilt and Height Adjustable stand, but I opted to get the same one I already ordered. Now, I will be the first to state that being able to afford two Studio Displays, along with a Mac Studio, is a privilege and this is not a normal configuration for most users.
The Mac Studio arrived before the second Studio Display, which was not expected. The delivery date range for my second Studio Display was a full week before the Mac Studio itself, but the Mac Studio arrived first. Why it arrived first, I do not know, but it surely did.
During the time without the second Studio Display I once again used the 27-inch Dell monitor as my second monitor. Having gone back to a single 5K screen with a 1080p display as the secondary screen was, suffice to say, less than ideal. Even in the brief amount of time that I had been using the Studio Display with my iMac, I had gotten used to having two 5K screens on at the same time, and having to go back to a screen with two different resolutions made me appreciate using two monitors with the same resolution.
One of the downsides with having a non-Apple supported monitor is that many of the adjustments on the monitor cannot be made through macOS. Chief amounts these is the brightness of the screen. Throughout the day I end up needing to tweak the brightness of my displays to either be brighter or dimmer depending on the amount of light. Even with True Tone and Night Shift, some adjustment is necessary.
Not being able to adjust the Dell monitor's brightness within macOS means using the cumbersome buttons underneath the display. Another downside to using the Dell is the fact that the two displays sit at two different heights. This latter issue is a minor one, but it can be hard to find something to place under the lower monitor to bring it up to the same height as the other monitor.
Now having had two 5K Studio Displays for a little while has only positively reinforced my decision to buy the second Studio Display. It is quite nice having two screens that are the same height and have the exact same feature set. I fully intend to use the Studio Displays for many years. It is quite likely that I will end up replacing the Mac Studio before either one of the Studio Displays, but only time will tell on that.
Having two identical displays really is the way to go. Even if you do not want to spend the money on multiple Apple Studio Displays, but you want two, or more, monitors, I would recommend buying the same monitors so that everything can be the same and there is no need to adjust a lot of things just to make everything work in the expectant manner.
Next, let us move onto something else, Touch ID.
Touch ID
The Mac Studio has two items in the box; the Mac Studio itself and a power cord. That is it. The Mac Studio does not come with a keyboard, mouse, or any other input device, which is a departure from the 27-inch iMac and the iMac Pro, but is keeping in line with the Mac mini. You may recall that I wrote a review of the Magic Keyboard Touch ID. I did that review with my base model M1 Mac mini, mostly because it was the only computer I could use the Touch ID keyboard on. When it was connected to the M1 Mac mini, the only time I used the Touch ID sensors to sign into the Mac mini, when I did need to connect to it and not through Screen Sharing.
Instead of buying a new Touch ID keyboard and mouse, which I may do at some point in the future because who does not like matching colors, I decided to use my existing Magic Keyboard with Touch ID and another Magic Mouse that I already had. Since the Touch ID sensor would not work with my 2017 iMac, nor on my early-2015 MacBook Pro, this is my first experience with using Touch ID regularly on macOS.
When I started using Touch ID on my Mac Studio I did not realize just how often I would need to fill in passwords. The iMac never prompted me for passwords, they were just automatically be filled in. Obviously having passwords automatically fill in without any biometrics is significantly less secure, but it is significantly more convenient. As is the case with all things in modern technology, there is a trade off between convenience and security. The more convenient you typically end up making something less secure.
It has taken me a bit of time to get used to the fact that I can log into my Mac Studio with Touch ID. I have been using may Apple Watch to unlock my Macs since I could enable the feature. However, a Mac will not unlock if the Apple Watch is locked. I am sure using Touch ID to unlock my computer will just take a bit of time to get used to and eventually it will become second nature.
Even though it is a bit more of an inconvenience to use Touch ID, it is definitely more secure. One area where Touch ID came in the handiest is when it came to logging into the Apple website. You can use your local account's password to authenticate with your Apple ID account. Now, with a Touch ID keyboard, I no longer have to enter in my password and I can just use the Touch ID sensor to authenticate. This interaction is so much quicker and a very welcome change.
Next, let us try and look at some of the speed of the Mac Studio, through encoding media.
Encoding Media
One of the features of the M1 Pro, M1 Max, and M1 Ultra, are that they are designed with video encoding and decoding in mind. The unified memory system on its own would help improve encoding speeds. The real speed improvement comes with the fact that there are dedicated video engines in these processors. Specifically, there are video encode engines and two ProRes encode and decode engines built directly into the processors. For the M1 Pro there is a single dedicated ProRes encode and decode engine. While on the M1 Max there are two, and there are four on the M1 Ultra.
I do not use ProRes in anyway, so I am not sure if they will ultimately go unused, I suspect they might. However, what will not go unused is the encoding engine. This is because I do like to convert my physical media into digital format so I can watch it on one of my Apple TVs.
Ripping a DVD
There are a number of ways of doing this. You can use something like Handbrake or FFmpeg. I prefer Handbrake myself. When I set up a new machine, I end up downloading new copies of apps, and this was definitely the case with the Mac Studio. If you use Handbrake on an Apple Silicon machine, be sure to update to the latest version, 1.5.1.
I ended up ripping one of the DVDs that I have. It was a standard 480p DVD. For the test I used HandBrake with an external USB DVD burner that I own. The DVD burner is USB-A and I connected it directly to my Mac Studio. As a side note, hardware makers, an 8-inch cable is not long enough, not by a long stretch. You really need to include more cable length on these devices, or make it detachable and replaceable.
The encoding maxed out at 155.18 frames per second, with an average of 119.19 frames per second. The entire encode only took 12 minutes and 13 seconds. While the DVD was encoding the temperature, as reported by iStat Menus, got up to 120 degrees and you know what, the fans did not even spin any faster. They were at around 1336 revolutions per minute, which is where they idle at.
Compare this to the 2017 iMac, which topped out at around 150.07 frames per second and averaged 118.19 frames per second. The total time took about 12 minutes and 16 seconds. This was the same USB DVD drive, with the same piece of media, using the same version of Handbrake with the same settings. These are comparable, which seems about right because the USB DVD drive was likely the limiting factor
The iMac did get warmer, at about 134 degrees celsius and that was with the fans on 100% at 2705 revolutions per minute. Obviously, I could hear the fans going on the iMac. Ripping from a DVD is only one option, the is another option, ripping from an image of the DVD.
Ripping from Image
I did another test, ripping from an image. I did two different tests, the first was ripping from the image on the internal drive to an external drive and the second was ripping from the image on the internal drive to the internal drive.
Mid-2017 iMac
When ripping from the DVD to an external drive, on the iMac the maximum speed was 179.81 frames per second with an average was 151.40 frames per second. Again, the iMac fan went to 100% at 2705 revolutions per minute. The ripping was done from the internal drive to an external, just as it was when ripping to DVD, as to minimize variability and this time it took 9 minutes and 32 seconds. So, this is about 3 minutes, or 25% faster.
Just to provide one last test, I ripped from the internal drive to another file on the same drive. The statistics for that were a maximum of 200.06 frames per second with an average of 149.24 frames per second and that encoding took 9 minutes and 40 seconds.
Mac Studio
Now, compared to iMac,, ripping the image to an external drive on the Mac Studio had a maximum of 402.27 frames per second with an average of 330.69 frames per second and it took 4 minutes and 22 seconds to rip. The temperature did rise to 146 degrees celsius but the fans never spun up beyond their idle speeds.
Ripping the image to local drive, from the local drive, showed a maximum of 401.33 frames per second and an average of 329.66 frames per second, all in 4 minutes and 23 seconds. The temperature was 147 degrees celsius and as expected, the fans never spun up beyond their idling speed of 1300 revolutions per minute.
As you can see, ripping a DVD image on the Mac Studio, whether to the internal drive or an external drive was 50% faster. I do not know if it makes sense to rip a DVD to an image and then rip it, because it would take a while to rip from the DVD drive to the image, much longer than just ripping from the DVD drive directly. Overall, I think I will use the Mac Studio for ripping DVDs to my library.
Next, let us look at some other measurements of how fast the Mac Studio is. That is through benchmarks.
Benchmarks
All of my reviews include the obligatory benchmarks. These benchmarks all used GeekBench 5. The devices include other M1 devices, Intel Machines, and even some devices that have A-series chips. The "ML" category is for iOS and iPadOS devices only, as GeekBench has yet to release a Machine Learning app for macOS, I wish they would though. So, onto the actual benchmarks.
| Device | Single Core | Multi-Core | ML (CPU) | ML (GPU) | ML (ML) | Compute (Metal) |
|---|---|---|---|---|---|---|
| Early 2022 Mac Studio (Max) | 1760 | 12238 | - | - | - | 59133 |
| Mid-2017 27-inch iMac | 1752 | 7780 | - | - | - | 21812 |
| iPhone 13 Pro Max | 1715 | 4409 | 926 | 2467 | 2722 | 14940 |
| 5th Gen iPad Pro | 1698 | 7203 | 1021 | 28837 | 2718 | 21256 |
| 6th Gen iPad mini | 1598 | 4637 | 892 | 1885 | 2537 | 12097 |
| Mid-2017 27-inch iMac | 1065 | 4188 | - | - | - | 41184 |
| Late 2019 16-inch MacBook Pro | 1099 | 5388 | - | - | - | 23194 |
| Late 2018 Mac mini | 1022 | 4736 | - | - | - | 4677 |
| iPhone X | 923 | 2568 | 502 | 885 | 435 | 4114 |
| Early-2015 MacBook Pro | 742 | 1540 | - | - | - | 5151 |
| iPod Touch 7th Gen | 503 | 1074 | 359 | 552 | 310 | 2311 |
| iPhone 6s Plus | 466 | 1013 | 326 | 539 | 284 | 2530 |
The results are what one might expect. The M1 family of chips is based on the A14, so all of those devices have roughly similar results. The one outlier is the 6th Generation iPad mini, which has an A15 in it. The M1 line of chips are based on the A14, and the A15 should have slightly better performance, look at the iPhone 13 Pro Max which also has an A15.
I am not sure why there is such a discrepancy, but when looking at the other Geekbench submissions, these results are inline with other 6th generation iPad mini devices.
Closing Thoughts
The Mac Studio is not an inexpensive machine by any stretch of ones imagination. It starts at $1999 for the M1 Max version, but can range to $7999 for the M1 Ultra with 8TB of Storage and 128GB of unified memory, and almost any price in between. Even though The Mac Studio is designed to replace both the 27-inch iMac and the 27-inch iMac Pro, the Mac Studio is not an all-in-one machine. Instead, it is modular.
The Mac Studio is a desktop computer that was introduced with an accompanying Studio Display. Taken together these pieces can be upgraded and replaced as needed. Modularity of the Mac Studio does not stop at just the device itself. The Mac Studio is also modular in terms of storage. It is not soldered on and allows Apple to easily replace or customize the storage in the Mac Studio without needing to create different logic boards with a variety of storage options.
The Mac Studio is a significantly faster machine than other M1 Macs available and if you are going to purchase one, you should be quite delighted by the speed. Along with the speed, the Mac Studio is replete with external ports, including four Thunderbolt 4 ports, two USB-A, one HDMI, and one headphone jack. One thing that differentiates the Mac Studio from other Macs is that there are also ports on the front of the Mac Studio. On the front there are two USB-C ports that support USB 4 and an SDXC slot.
If you are a developer and using an Intel-based machine, you should really look at getting a Mac running Apple Silicon. It will definitely be a game changer for development. If you prefer laptop, the 14-inch or 16-inch MacBook Pro is a good choice, but if you want a desktop you cannot go wrong with the Mac Studio as your machine.
If you are looking to order a Mac Studio, you might want to place your order now, many configurations have a delivery range of 10 to 12 weeks, meaning as of this writing you are looking at August for a delivery date.